Friday, July 19, 2013

Going Carless

Who needs a car anyway? My neighborhood is ranked as "very walkable" with a walkability score of 75. Meaning most of the errands that I should need to run can be accomplished on foot. There shouldn't be much reason for needing a car.

So when my lease expired, I turned in my Jetta and started my journey as a person without a car.

Why? You might ask yourself. Several reasons:

  • I don't feel like I really need a car. I don't do that much driving and most of the driving I do can be serviced by other options. 
  • Cars are expensive, especially if you don't use it often. Who needs that expense? I have better things to spend my money on. Well that is the theory anyway. 
  • Maybe i can reduce my carbon footprint this way. 
There are other reasons, you may be able to think of, but those are the main ones for me.

How? You also might be asking. I plan to try to use these replacements, in this order.:

  • Walk
  • Bike
  • Bus
  • Carshare
    • Car2Go
    • Lyft
    • Sidecar
  • Motorcycle
I'm certainly not without options here. These are basically in order of cost, then how long it would take me. This is kind of an ideal preference, but lately it has been more like this: 
  • Motorcycle
  • Carshare
    • Lyft
    • Sidecar
    • Car2Go
  • Bus
It has been a week or so, a week of no rain (easier to ride) and not a lot going on, maybe my opinion will change as time goes on? I'll try to keep this blog updated regarding my progress.

Play audio output to multiple devices via pulse audio, or more pulse audio woes.

I've since moved past Ubuntu 12.04 to 13.04 and have run into more troubles with pulseaudio. This is unrelated to my previous issues.

Admittedly this is a fairly fringe case that most people would not run into but that seems to be my experience with Linux in general. Usually a quick google search fixes me up, but this one was a bit trickier.

I have a media center setup with xbmc on a full desktop install of Ubuntu 13.04. It works great, I use the desktop for various things that xbmc has yet to integrate with  or doesn't yet have a great experience with. (e.g. Google Play Music, songza, youtube), and use xbmc to play my movie and TV content.

From my media center to my PC since I'm often playing high quality content I tend to prefer using HDMI to connect the two. It is easy and provides a very high level of quality. Unfortunately for me (and apparently for most modern receivers) my receiver will only output analog audio to my speakers on my patio (Zone 2) and HDMI is a digital signal. And thanks to the copyright issues with converting a digital HDMI signal (hard to copy) to an analog signal (easy to copy) the capability to convert to analog is stripped out of the HDMI connections.

So what this means practically is I have to connect an analog cable from my media center to my receiver as well as the digital HDMI connection. This gives me the best of both worlds, the reciever basically selects the highest quality signal that it can deliver. The trick is that I have to broadcast the signal to more than one device, which is not something pulse audio is setup to do out of the box in Ubuntu 13.04.

What is the fix? I did some googling and found a suggestion to use the paprefs package to control the Pulse Audio Preferences. Unfortunately for me this didn't work, despite an indication that it should from the information in paprefs. Essentially you enable simultaneous output and pulse audio is supposed to broadcast the signal to all your output devices. It never output to my analog out.

Back to google and I found this info: https://wiki.archlinux.org/index.php/PulseAudio/Examples#Simultaneous_HDMI_and_Analog_Output

Relevant sections copy/pasted below.
<snip>

Simultaneous HDMI and Analog Output

PulseAudio allows for simultaneous output to multiple sources. In this example, some applications are configured to use HDMI while others are configured to use analog. Multiple applications are able to receive audio at the same time.
$ aplay -l
**** List of PLAYBACK Hardware Devices ****
card 0: Intel [HDA Intel], device 0: ALC889A Analog [ALC889A Analog]
  Subdevices: 0/1
  Subdevice #0: subdevice #0
card 0: Intel [HDA Intel], device 1: ALC889A Digital [ALC889A Digital]
  Subdevices: 1/1
  Subdevice #0: subdevice #0
card 0: Intel [HDA Intel], device 3: HDMI 0 [HDMI 0]
  Subdevices: 0/1
  Subdevice #0: subdevice #0
The key to a configuration like this is to understand that whatever is selected in pavucontrol under Configuration>Internal AUdio is the default device. Load pavucontrol>Configuration and select HDMI as the profile.
Add the following to /etc/pulse/default.pa to setup the analog as a secondary source:
### Load analog device
load-module module-alsa-sink device=hw:0,0
load-module module-combine-sink sink_name=combined
set-default-sink combined
Restart PulseAudio, run pavucontrol and select the "Output Devices" tab. Three settings should be displayed:
  1. Internal Audio Digital Stereo (HDMI)
  2. Internal Audio
  3. Simultaneous output to Internal Audio Digital Stereo (HDMI), Internal Audio
Now start a program that will use pulseaudio such as mplayer, vlc, mpd, etc. and switch to the "Playback" tab. A pulldown should be available for the running program to select one of the three sources.
</snip>
This did work! YAY, now I'm able to listen to audio on my patio without much trouble. Rad!

Tuesday, March 19, 2013

Pulseaudio woes

I have an ASRock 890FX Delux4 motherboard that I was having a damned of a time getting the audio to work on in Ubuntu 12.10.

The solution turned out to be that pulseaudio didn't have the device selected as the output, but that was completely not discoverable via the UI.

I had to install an extra program to tell pulse to use an output channel other then what it was using by default.

sudo apt-get install pavucontrol

 This was the ticket I needed, selected the correct output for sound and viola! magic.

Percona/MariaDB libmysqlclient18 dependency snafu

Sometimes the efficiencies of the apt tools in Ubuntu amaze me. There I was running along happily with MariaDB and decided to do a sudo apt-get dist-upgrade, the command has never failed me in the past, so I was confident that Ubuntu would figure out the "correct" thing to do and I blindly confirmed the recommendation without reading what apt was going to do. BAM! A few seconds later MariaDB is successfully uninstalled *blink* what? No problem a simple reinstall should fix that, easy peasy. Well you see the thing is that now there is this dependency problem with libmysqlclient18 and Ubuntu can't figure out how to resolve that so... no db for you!.


I guess what happens is the MariaDB (and Percona too I found out) repositories package a different version of the libmysqlclient18 in thier repective repositories. Sometimes Oracle (The owner of MySQL) releases a newer version of libmysqlclient18 without much notice. Apt thinks the new version is the hot ticket to install and installs it, but the DB in question still need the old version of the package, since it isn't installed anymore they are removed.

There are a few solutions.

  1. Don't do a dist-upgrade, instead do an upgrade... this should prevent the upgrade that removes maria/percona. 
  2. Create a preference file for your repository of choice that tells Ubuntu that, use the version of packages from the DB repository, not your own standard repsitory. 
I struggled to find any great documentation on how to create the preference file to pin the db packages so they come from the repository, so here is the shortcut version.

The big help for me was this post that details how to install percona on Ubuntu 12.10. http://ubuntuforums.org/showthread.php?t=2116360

You need to create a file in /etc/apt/preferences.d/yourFileName.pref

This is what I put in mine:
Package: *
Pin: release o=Percona Development Team
Pin-Priority: 1001

This tells apt to give preference to any package that is contained in the Percona repo. You can replace the * with a specific package, which will only impact that one package. You can also have different levels of preferences by adjusting the Pin-Priority attribute for more preference (higher number) or less preference (lower number).

In order to find the info for the o= switch. I pointed my browser to the address that is listed in /etc/apt/sources.list for that repo, then navigate to the conf/distributions file. The entry you are looking for is the Origin line, that is what you put on the Pin: release o=<put the info from the distributions file, origin line>

For Percona this is the file: http://repo.percona.com/apt/conf/distributions
For MariaDB this is the file(i use the OSU OSL repo, so adjust for yourself): http://ftp.osuosl.org/pub/mariadb/repo/5.5/ubuntu/conf/distributions

Once I did this and apt-get update I was able to install just like normal.

Saturday, March 2, 2013

Percona database won't start

I just finished a long hair pulling session trying to get Percona 5.5 installed on Ubuntu 12.10. What was happening is I would install from the percona repositories and everything would seem to go fine. I would attempt to move the data and log files away from the default location so that I could serve them from my ZFS pool and when I would put in the change into the my.cnf file the database would no longer come back up. It seemed like it was still starting, as I was seeing process running, but just one when I should have seen 12 or so.

This case was particularly frustrating because the my.cnf file I was using was generated by the Percona Configuration Wizard (https://tools.percona.com/wizard). The Configuration Wizard is a really great tool that takes some input from you about your server and intended use and outputs a config file for Percona. I assumed the configs generated from here would just work, but they don't.

What I figured out in the end is the /etc/init.d/mysql script uses the /etc/mysql/debian.cnf file settings to check if the mysqld server is up or not by pinging on the socket located at /var/run/mysqld/mysqld.sock the config file puts the socket by default into your data directory (on my zfs pool).

Two possible solutions, one verified, one should work in theory:

  1. Change the config generated from the wizzard to put the socket at the location that debian.cnf expects it. (/var/run/mysqld/mysqld.sock). This is what I ended up doing and it worked very well. 
  2. create a symbolic link between where you socket is, and where the startup script thinks it should be. e.g. sudo ln -s /path/to/your/actual/file/mysqld.sock /var/run/mysqld . This should work in theory and the reason I didn't do it this way is I'm not sure if there is special syntax for creating a symlink to a socket, or if there were any special considerations for reboot scenarios. 

Wednesday, February 27, 2013

View DNSMasq Leases

Use this command to view the current DHCP leases handed out by DNSMasq:

 cat /var/lib/misc/dnsmasq.leases  

SSH and remote administration. Not just for the command line.

Having the ability to remotely access a network is a great benefit for someone who does remote maintenance or troubleshooting. My tool of choice for this is SSH because:
  • Fairly Secure
  • Less hassel then a full VPN 
  • Installed by default on most Linux installations. 
  • Very flexible. 
SSH stands for Secure SHell and that is exactly what you get with the basic invocation of SSH:

 ssh plecebo@my.example.com   

The first time you execute this command your SSH client will ask you if you want to accept the certificate of the machine you are connecting to. Usually this is a fairly safe practice, but for those who strive for excellent security practices it is usually best to not accept this certificate but obtain it through some verifiable means (physically copy from the remote server and add it on your local machine). That being said I usually accept the certificate.

Once this command executes you will have a terminal open on the remote machine. This is exactly like the terminal you had open on your local machine.

Sometimes working in the terminal can be a real pain in the ass. Especially if there are good alternatives such as a web interface. You may want to connect to a remote network and use and application (web browser) as if you were sitting on site. SSH can help with that using Dynamic Port Forwarding.

 ssh plecebo@my.example.com -D 1234 -N  

This creates a Dynamic forward (SOCKS Proxy) from your computer to the remote computer on port 1234. The -N option keeps sneaky stuff from being executed on the remote machine. It is not required but recommended.

Now configure your application to use the proxy (localhost:1234) and all proxy traffic goes through to the remote computer and appears to come from that network. Most browsers have proxy settings you can configure. Here is a screen shot of Firefox configured for the above proxy.


What if you want to use an application to connect to a private resource on the remote network? For example you want to Remote Desktop into a windows XP machine on the remote network. SSH has you covered.

 ssh plecebo@my.example.com -L3388:192.168.1.100:3389 

This creates a tunnel through the remote computer to the resource behind the firewall. After you execute this command you simply use the address 127.0.0.1:3388 in your application and you will be connected to the resource on the remote network at 192.168.1.100:3389 (3389 is the remote desktop port).


There are also many Remote desktop clients that will connect via SSH for you. I like to use Remmina (http://remmina.sourceforge.net/) since it comes installed by default in Ubuntu and it suits my needs very well.

Sunday, December 16, 2012

Recover a dead hard drive with ddrescue

I use Ubuntu, so this is geared towards using that OS, but gddrescue (ddrescue) should be available on most Linux distributions.

I got most of this info from: https://help.ubuntu.com/community/DataRecovery

Install with:
sudo apt-get install gddrescue

Find the disk to rescue with:
sudo fdisk -l

Then run the command using a command like this:
sudo ddrescue -r 5 /dev/sdf /tank/Backup/image /tank/Backup/logfile

In this case 5 is the number of retries attempted to read the data before giving up, /dev/sdf is the path to the device that you found via fdisk -l /tank/Backup/image is the image file that will be written. /tank/Backup/logfile is a logfile that is kept of the recovery.

If the backup is interrupted or you want to run it for another pass with hopes of recovering more information use a command like this:
sudo ddrescue -r 5 -C /dev/sdf /tank/Backup/image /tank/Backup/logfile

Note the -C which tells ddrescue to pickup where it left off, or try to fill in the blocks that are missing

Monday, November 26, 2012

Obtaining Nexus 4

It sounds like some elusive artifact and in some ways it is. Google's new Google phone has been notoriously difficult to purchase since its release November 13th. In events that were surprising to me, but probably not to those who suffered through the Nexus 7 release of a few months ago, the launch was pretty painful.

Firstly I think Google severely underestimated the desirability of the phone since the order page was reporting sold out within 30 minutes of the phone being available, globally.

Second, the play store was unable to handle the load of everyone wanting Google stuff like right now. This is embarrassing for Google in my opinion, the company that can serve you search results to anyplace on the planet in under a second and has so much computing power at their disposal to allow such a service to crash is just bad form.

Third, there has been an extensive communication breakdown along the whole process. Starting from Google selling more of the Nexus 4 then they had current stock to cover, a problem probably related to the play store crashing. Continuing with people who now have the phone backordered and have no good ideas when they will be getting the phone. Culminating with people who were wanting a phone and didn't get a chance getting some idea when more stock will be made available. The backorder group have it the worst, being left completely in the lurch on a purchase they had rightfully made. Compensation for them is "free shipping" when the device becomes available again, not insignificant, but not much in the way of an apology from Google either.

The group eagerly awaiting the opportunity to throw their money at Google, of which I am one, are often obsessively visiting the play store to check availability, hoping that by lucky chance they will see that aqua "Add to Cart" button and be allowed to purchase. In my case the obsession occasionally borders on unhealthy, giving rise to the enrollment in various mechanisms that promise a prompt notification of availability, sometimes at the cost of real american dollars. My skepticism of the reliability and/or timeliness of these various services is evident in my continued search for more of their brothers. The latest and hopefully final incarnation being a paid ($1.02) app for my current Google phone that will check availability with frequencies as low as once per minute and upon discovery, notify me through some alert.

Why such a rush to buy another phone when I have a phone that is fairly new as it is you may ask? Simple, the sooner I switch from my current provider (Verizon) to T-Mobile the more money I will save over the next year. Each month that I have to wait is about $40 less in savings over the year, so I'm motivated.

Not to mention I'm very excited for the new tech. The biggest thing that kills me about my current phone (Samsung Galaxy Nexus) is that despite being branded as a Google phone the is upgraded processes are very much governed by Verizon's slow to push updates mentality. Not to mention the inclusion/exclusion of certain apps on the stock images make the phone a Google phone in name only, and not in reality. Its like I have the bastard brother of the Nexus line, last for updates and the one who the carriers have the most control over.

There are rumors that more stock will be coming into the store tomorrow, but there are still people with unfulfilled backorders so that would surprise me. *fingers crossed*

Monday, November 19, 2012

We went dark there for a while

Somewhere between altering a PHP script I found to migrate Drupal content to Blogger and writing my own Python script to do the same I lost focus on the site and plecebo.org was down for several days.

Apologies to anyone who was inconvenienced, but I feel pretty good that I'm how I want to be over at Blogger.

I ended up using conversion of this script: https://github.com/nschloe/drupal2blogger over to Python and SQLAlchemy. It worked fairly well, but I was never able to get comments to work for me at all, so I'll be migrating those by hand. Lucky for me the Plecebo.org site never had many comments and I think I'm looking at migrating less then 10 comments. :) Very doable.

I'll try to clean this up a bit and make it available via a github repo in the near future.

Friday, November 9, 2012

Hike: Snow and Gem Lakes

Hike: Snow Lake and Gem Lake
Distance: 10 miles
Location: Snoqualmie Pass area
Snow and Gem Lakes
I found these hikes while cruising the WTA (Washington Trail Association) site trip reports. I found some week old reports that had great reviews of the fall colors so I thought I should give them a try before they got all snowed in. I was a bit late for the fall colors, but I was well rewarded for my timing. 

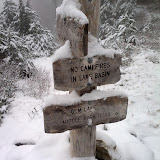
I got to the trail head a bit later then I had wanted. I forgot to check this hike for required passes and so had to make a stopover at the Snoqualmie ranger station to pick up the proper passes, not a big deal, it only set me back about 30 minutes.  Even with the delay I was on the trail around 8 AM with only 2 other cars in the parking lot. The air was chilly so I was glad I had brought some layers for the cold weather, but I was definitely not expecting temperatures around freezing starting out with some small accumulation of snow on the ground.

I decided t hike until I was in snow over my ankles or until it started snowing. I was not equiped to spend a night snowbound, so I wanted to be on the safe side. 

The hike starts out on a fairly flat trail working its way through some rock slide areas in and out of forests. At around 1.7 miles the trail cuts sharply and starts to climb immediately up to the ridge. At the top of the ridge you enter the Alpine Lakes wilderness (YAY!) and you get this great view of snow lake through the trees. The snow on the lake made it even more gorgeous, it was an amazing site. The trial drops down to the lake and you walk along the lake edge for a while before circling behind a ridge to the next trail junction. You mix back up with the shores of Snow Lake off and on then start to climb away from the lake towards Gem. 

I actually never made it to Gem lakes, the snow started to come down a bit heavier and I didn't want to get caught out there, so I turned around and high tailed back to the trail head. From what I figure looking at maps etc I was less then 1/4 of a mile from Gem. Oh well, I'll have to get it next time. :)

I was really surprised by the performance of the shoes. This was just my 2nd hike with the trail runners and they did great. I kind of expected my feet to be soaked and freezing when I got back to my car, but my feet never got cold and I'm not sure the slight dampness I had was not from my feet sweating as much as it was from the snow. I definitely had snow on and around my shoes and despite being not water proof, water and my feet were never really a problem.

All in all I'm really glad I did this hike, there was really a perfect amount of snow to make the hike enjoyable the whole way and not too treacherous without special gear.  The scenery was fantastic and the hiking was fairly good. 

Things I would do differently next time:
  • I need to put together a good 10 essentials kit, consider carrying a shelter too if I'm suspecting snow like 
  • Glasses + hiking = fogged glasses (contacts coming soon)
  • Double check your permits before you go
  • Take more pictures
  • I should start recording elevations for my hikes. I wonder if I should get a GPS that could do it automatically for me? Hmm.

Monday, November 5, 2012

Hike: Rattlesnake Mountain

Hike: Rattlesnake Mountain
Distance: 20.5 mi
Location: Snoqualmie area I-90

My goal for this hike was to see how my body fared on a long hike. I have decided to seriously look into through hiking the PCT in 2014. While that sounds like a long ways away I have a lot of unanswered questions and preparations to make before I can undertake the adventure feeling prepared.

For those that don't know the Pacific Crest Trail (PCT) is a National Scenic trail that starts at the US/Mexico border and continues north through California, Oregon, and Washington on its way to Canada. It is 2,600 miles give or take and it travels through some of the most highly regarded scenery in the US. Because of the threat of snow in the High Sierra mountains most people start the trek around the end of April and finish 4-6 months later.

One of the things that concerns me most is the rigorous pace that is required to finish the PCT before the weather makes traveling in the upper Cascade elevations very difficult. For me I would only really be able to attempt the trek if most of my time on the trail was covered by vacation time that I have from work. With that in mind I've been tentatively budgeting 16-18 weeks for the whole PCT. Operating under those assumptions I will need to be averaging 25-30 miles of hiking per day.

That is a lot of hiking, and I am just not sure my body is up to the task. I've had some issues with my feet in the past that could make the trip impossible for me right from the get go. In order to find out I wanted to try a nice long hike that somewhat simulates what I could expect on the trail.

I chose the Rattlesnake Mountain hike because it had a good amount of mileage and was pretty close to home. The higher hikes around Seattle are starting to get a bit dicey when it comes to snow and the threat of snow. Rattlesnake Mountain is a fairly low elevation so it should stay clear of significant snow for quite a while.

I decided that for this trip I would try out the suggestions of trail running shoes rather then proper hiking boots. I've tried several boot styles, weights, brands etc (as my girlfriend can attest a trip to REI usually means at least 40 minutes of me looking at shoes). I chose a pair of Salomon XA Pro 3D Ultra 2 trail running shoes 1 size larger then my typical shoe size. I hadn't tried them on even the morning I set out, which when you are talking about boots is a death sentence. They performed very well and I only got a tiny blister on my heel after the whole 8 hour ordeal.

I also loaded up a backpack I have with about 15 lbs of various stuff in order to get an idea what it might be like on the PCT.

Something I have never considered before is the use of an umbrella while hiking. I've been reading that quite a few people hike the PCT with umbrellas because the afford good protection from the sun and the rain. I was surprised how nice it was to pop open the umbrella when the rain started coming down, rather then getting my rain jacket out.

20+ miles is a long way to hike, by just about anyone's estimations. 20 is pushing and probably beyond the range of my longest walking adventures. I have to say however that I was very impressed with how I felt after the 8 hours of hiking. I was definitely tired, and had some serious muscle soreness the following day, but I feel like I could have maybe done another few miles if I had rested for a little bit.

This is a good sign for my PCT hike. 20 miles would be a low mileage day for me on the PCT but considering that I haven't hiked seriously in over a year, I haven't been working out for the passed 2-3 months, I've always had issues with shoes and hiking, I think I did pretty darn well.

The hike itself was quite nice. The day was mostly drizzly and overcast. The trail moved through overgrown logging roads, clear cuts, under some power lines, through dense forests thick with fog, across some streams, and stopped at a lake. I had lunch and hiked the trail in reverse. The first 2/3 of the hike to the lake I was practically alone, except for a few runners. Then I started running into those hiking from the Rattlesnake Ledge trail head.

Overall I'd say the trip was a success here are some takeaways:
  • I need to drop a few pounds. Each pound I don't have to carry from the start the finish will make the whole trip that much easier.
  • I need to start up a cardio program again. I wasn't panting TOO bad on the trail, but it wasn't a walk in the park for me either.
  • I should maybe get my ankle and knee checked out by a professional. They weren't too bad on the trail, but within a few hours of being off the trail they were definitely sore. Perhaps hiking poles would help, but I'd rather see if I could address the real problem.
  • I will never wear hiking boots again. Ok maybe never, but never for hiking when there isn't feet of snow.
  • Hiking with an umbrella is awesome!
  • I do really like hiking. Something about being in the woods, with no one around is really calming for me.

A change of direction around here

Whoa! That was sudden! Unless you don't come to this blog that often you may have noticed that it looks entirely different then it used to.

What's going on eh?

I've decided to re-kindle and re-purpose my use of this blog. I want to move away from just dumping to any potential readers the things I find amusing on the internet and towards a place people can come to find out what is happening in my life. I hadn't posted anything to plecebo.org in over a year for several reasons, but largely because I felt like there was no one listening. What is the point in broadcasting information if you aren't broadcasting to everyone. So my intent here has changed. Hopefully I can use this space to chronicle the things in my life I love and you can come here to read about it.

Additionally I'd like to use this blog to document my preperation for a Pacific Crest Trail through hike in 2014. It is a HUGE undertaking, and larger then anything else I've ever attempted. Stay tuned as I lay out my reasons for wanting to do the hike, and the things I'm doing and thinking about related to the hike.

Yea but where is all that great blog content that I used to come to your site for?

I knew that was your real question. For now you can find that content here: http://old.plecebo.org But over time I plan to migrate that information (by hand painstakingly) from the old platform (Drupal) to the new platform (Blogger). I just don't want to be responsible for keeping up with security updates on Drupal anymore.

Friday, November 18, 2011

Split Lossless Audio and tag it.

Nearly all this information was found on the blog:http://aidanjm.wordpress.com/2007/02/15/split-lossless-audio-ape-flac-wv...

The steps below are the steps that I follow to split my own audio that I find still in a single lossless file (usually .wav).

sudo apt-get install cuetools shntool flac
cuebreakpoints sample.cue | shnsplit -o flac sample.wav
cuetag sample.cue split-track*.flac

Thursday, November 17, 2011

All I want to do is give you my money!

I HATE to write paper checks. The reasons are many but to avoid making this post more about my hate of checks and less about the bogus extra fee the City forces on those who choose to pay in a more convenient way here is a short list of my issues with checks:


  • My handwriting sucks

  • I can never find my checkbook

  • Checks seem like a throwback from the past

Sunday, November 13, 2011

Backup Server

Backup is a server meant to work in conjunction with Zeus to perform offsite nightly backups of each other. Backup sits at one site and Zeus sits at another. Backup is a backup aggregration point for its site. Collecting all the backup files in one place so they can be pushed to Zeus nightly.

Hardware

Backup consists of the following hardware:
  • Supermicro MBD-X7SPA-H-O motherboard (Atom Based) 
  • CHENBRO ES34069-BK-120 Black SECC Pedestal Server Chassis 120W 
  • 16GB Mushkin USB drive used as the system drive 
  • 2x 2GB GSK F2-5300CL5D-4GBSA R RAM 
  • 4x 1TB WD SATA2 WD10EVDS green hard drives 

Installation

Ubuntu Server 10.04 64bit is installed on the Mushkin usb drive. The installation was pretty standard, I didn't change anything during installation and only selected to install the OpenSSH server role.

Post installation I updated & dist-upgraded, rebooted then installed a few packages: htop vim-nox mdadm xfsprogs xfsdump openssh-server

MDADM installs postfix by default and I chose to accept the default settings.

MDADM

mdadm is the linux raid interface that allows you to manage, create, and destroy your raid array. The man page is very detailed and helpful.

Partition

For each of the 4x1TB hard drives I had to create a new partition and set its type to the Linux RAID type.
For each of the disks do this:

sudo fdisk /dev/sda

chose to create a new primary partition (command n) use the default values to create a partition that takes the whole disk
change the partitions system ID (command t ) to Linux raid auto (code fd)
write the table to the disk and exit (command w)

Repeat those steps for each drive

Create the /dev/md0 array

I created the Raidarray using this command

sudo mdadm --create --verbose /dev/md0 --level=5 --raid-devices=4 /dev/sda1 /dev/sdb1 /dev/sdc1 /dev/sdd1

The array started syncing. An interesting note that gave me pause at first is that the array builds in a degraded state (with 3 of the 4 drives active) and the 4th device marked as a spare. After the initial sync it will add the spare back into the array.

cat /proc/mdstat looks like this:

Personalities : [linear] [multipath] [raid0] [raid1] [raid6] [raid5] [raid4] [raid10]

md0 : active raid5 sdd1[3] sda1[0] sdb1[1] sdc1[2]

2930279808 blocks level 5, 64k chunk, algorithm 2 [4/4] [UUUU]


unused devices:

Create an mdadm.conf

This is the file that tells mdadm how to assemble your array when it first starts up. Without this you will need to do an mdadm --assemble on each reboot.

and my /etc/mdadm/mdadm.conf looks like this:

DEVICE partitions

HOMEHOST

MAILADDR me@myrealaddress.com

ARRAY /dev/md0 level=raid5 num-devices=4 metadata=00.90 UUID=3577b84b:f6e2fa73:e508a82b:f6f9bec0


this was created using these commands as root (sudo will not work for them):

echo "DEVICE partitions" > /etc/mdadm/mdadm.conf

echo "HOMEHOST " >> /etc/mdadm/mdadm.conf

echo "MAILADDR me@myrealaddress.com" >> /etc/mdadm/mdadm.conf

mdadm --detail --scan >> /etc/mdadm/mdadm.conf

Just for completeness, here is the output of mdadm --examine /dev/sda1

mdadm: metadata format 00.90 unknown, ignored.

/dev/sda1:

Magic : a92b4efc

Version : 00.90.00

UUID : 3577b84b:f6e2fa73:e508a82b:f6f9bec0 (local to host ASBackup)

Creation Time : Wed Sep 8 02:51:51 2010

Raid Level : raid5

Used Dev Size : 976759936 (931.51 GiB 1000.20 GB)

Array Size : 2930279808 (2794.53 GiB 3000.61 GB)

Raid Devices : 4

Total Devices : 4

Preferred Minor : 0


Update Time : Wed Sep 8 11:47:49 2010

State : clean

Active Devices : 4

Working Devices : 4

Failed Devices : 0

Spare Devices : 0

Checksum : 84d0cdaa - correct

Events : 38


Layout : left-symmetric

Chunk Size : 64K


Number Major Minor RaidDevice State

this 0 8 1 0 active sync /dev/sda1

0 0 8 1 0 active sync /dev/sda1

1 1 8 17 1 active sync /dev/sdb1

2 2 8 33 2 active sync /dev/sdc1

3 3 8 49 3 active sync /dev/sdd1

Format the array as XFS

Once the array was created I used

mkfs.xfs /dev/md0

to format the drive as xfs

Mount the array

I create a mount point for the array at /mnt/raid

sudo mkdir /mnt/raid

I then found the UUID of my raid array using blkid which for me gave this output:

/dev/sda1: UUID="3577b84b-f6e2-fa73-e508-a82bf6f9bec0" TYPE="linux_raid_member"

/dev/sdc1: UUID="3577b84b-f6e2-fa73-e508-a82bf6f9bec0" TYPE="linux_raid_member"

/dev/sdd1: UUID="3577b84b-f6e2-fa73-e508-a82bf6f9bec0" TYPE="linux_raid_member"

/dev/sdb1: UUID="3577b84b-f6e2-fa73-e508-a82bf6f9bec0" TYPE="linux_raid_member"

/dev/sde1: UUID="e77eb088-01de-41ab-bc0e-79d155f75642" TYPE="ext2"

/dev/sde5: UUID="Nf7hnj-ejy2-2jcm-h38l-urRP-rwng-oGecSz" TYPE="LVM2_member"

/dev/mapper/ASBackup-root: UUID="f862f5de-832c-4fb5-ab88-ae5eb848456a" TYPE="ext4"

/dev/mapper/ASBackup-swap_1: UUID="69b9bdaa-7b39-4175-a083-91287d1d0fbc" TYPE="swap"

/dev/md0: UUID="e366c151-d9ee-467e-967a-ed228d79c51d" TYPE="xfs"

The last one was important to me, since I wanted to auto mount the raid array on boot I would need to add an entry into my fstab

Add the array to the fstab


/etc/fstab will make sure that your drive is mounted each time the device is mounted. So this went into my fstab:

#/dev/md0 raid device

UUID=e366c151-d9ee-467e-967a-ed228d79c51d /mnt/raid xfs rw,user,auto 0 0

I then typed:

mount /mnt/raid

and the raid array was ready for business.

Testing drive failure

Since this server will be running in a remote location it is even more important that I be able to detect issues that may be arising on the server so I can either login remotely to troubleshoot or order new parts ASAP to keep the server running.

I am especially concerned about the raid array having issues and I want to be notified via email if there are problems with it. In order to simulate a drive failure I issue the following commands:

sudo mdadm --manage /dev/md0 --fail /dev/sda1

mdadm: metadata format 00.90 unknown, ignored.

mdadm: set /dev/sda1 faulty in /dev/md0

at this point I received an email in my inbox nearly instantly with the following information (it actually went to my spam folder, so look for it there):

This is an automatically generated mail message from mdadm

running on Backup


A Fail event had been detected on md device /dev/md0.


It could be related to component device /dev/sda1.


Faithfully yours, etc.


P.S. The /proc/mdstat file currently contains the following:


Personalities : [linear] [multipath] [raid0] [raid1] [raid6] [raid5] [raid4] [raid10]

md0 : active raid5 sdd1[3] sda1[4](F) sdb1[1] sdc1[2]

2930279808 blocks level 5, 64k chunk, algorithm 2 [4/3] [_UUU]


unused devices:

Cool!

To put the drive back in the array use the following commands:

sudo mdadm --manage /dev/md0 --remove /dev/sda1

mdadm: metadata format 00.90 unknown, ignored.

mdadm: hot removed /dev/sda1


sudo mdadm --manage /dev/md0 --add /dev/sda1

mdadm: metadata format 00.90 unknown, ignored.

mdadm: re-added /dev/sda1

And the array starts to rebuild:

cat /proc/mdstat

Personalities : [linear] [multipath] [raid0] [raid1] [raid6] [raid5] [raid4] [raid10]

md0 : active raid5 sda1[4] sdd1[3] sdb1[1] sdc1[2]

2930279808 blocks level 5, 64k chunk, algorithm 2 [4/3] [_UUU]

[>....................] recovery = 3.2% (31718400/976759936) finish=299.9min speed=52512K/sec


unused devices:

WIN!

Saturday, November 12, 2011

LVM Resources


From: http://www.howtoforge.com/linux_lvm

pvcreate /dev/md0
vgcreate imagestore /dev/md0
lvcreate --name ASZenData --size 500G imagestore
lvcreate --name ASZenSystem --size 10G imagestore
lvcreate --name VirtualBoxMachines --size 20G imagestore
mkfs.ext4 -m 1 /dev/imagestore/VirtualBoxMachines

KVM Virtualization

For Digium Cards:
"If you want to use KVM you'll need VT-d.

Xen supports paravirtual PCI passthrough which doesn't require VT-d. I
don't know about Vmware, etc.

Best Regards
Kenni Lund"
If your server doesn't support VT-D you will need to use XEN or move away from using the Digium cards

Monday, September 19, 2011

Bad Lip Reading: Michele Bachmann


 This is a recreation of a post I lost in the migration. I'm 99% sure all it had was a embedded video and nothing else.

Wednesday, August 31, 2011

Swarminoid

These robots are really cool.


Check out the project here: http://www.swarmanoid.org/index.php